
Use our online designer studio to create your own personalised flyers, business cards, greeting cards and more.
Order NowWhen it comes to professional printing and advice on your business marketing, we are the team to call! You can call us direct on 04 568 8773 or fill in our quote form.
Request a Quote
All our prices assume that you provide “print-ready artwork”. Yet, surprisingly, many of the files that we receive to print are not print-ready. If a file is not print-ready then we either charge for time to properly prepare the file or you accept the consequences of printing a file as supplied. So what do we mean by “print-ready”?
In short, a file is “print-ready” when it is in a format that we can send direct to the printing software that will produce the output that the client expects. Yeah, I know – that doesn’t really help! So here are some finer points on what we mean by print-ready.
But before we give you “the list,” we realise that most of our clients are not graphics designers (and some of those that call themselves designers aren’t). If any of this seems a little like hard work, we’re happy to get things right for you. Many of the most common problems can be fixed for about $10 (but it does depend on the exact circumstances of the file, of course).
File Format
Your file needs to be in a recognisable and printable file format. The most reliable here is PDF format (click here for how to create a PDF). We can print from many software packages, but with a PDF you are almost assured that what you see on your screen is what we will print.
We DO NOT consider a graphics file to be print-ready (JPG, BMP, TIFF, PNG etc) as they always require processing before we can print them – in fact, we usually have to drop them into Publisher or some other quick-and-dirty tool to get them sized right to print. So please, don’t send us JPEGs unless are willing for us to charge a little bit to get your file ready. If you must do this, please read the comments below on Photoshop!
Some notes on common software packages:
You do not need to put in crop marks (we can add them), but they do no harm if you leave them in.
Page Size and Bleed
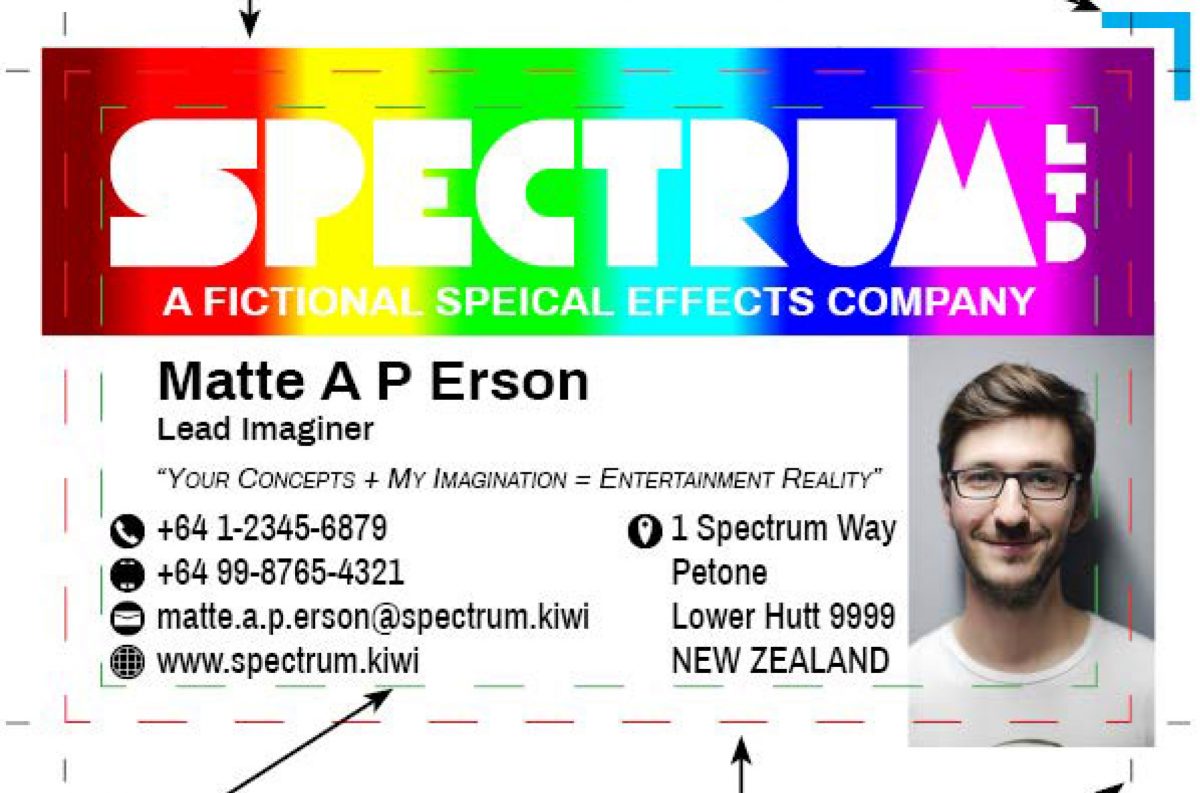
Bleed is one of the biggest problems we get. If you want the background or images to be printed right to the edge of the printed page we call that “full bleed” because image “bleeds” off the page. If you want a white margin around all the edges of your page (that is, a margin with NO printed content) we call that “no bleed.” Because a printer has trouble printing to the edge of the page and there is a chance of slight drift when we cut, you MUST give us a bleed zone if you want a full bleed job. We’ve already covered a lot about this above, and have an entire article dedicated to it (here), so check it out.
If you send us a file that is intended to be full-bleed but you don’t give us a bleed zone (3mm is the minimum we accept) we can do any of the following:
You also need to ensure that your file is on the correct page size. While we can scale your file you might not be happy with the results. It’s always safest to design for your desired output size. A low resolution image might look OK as an A6 flyer, but as an A3 poster it could look very chunky. You can read more about resolution here.
Layout
Please do not try and lay out your file as you would for printing on your home inkjet! Please send us a single image and do not gang it up so that there are (for example) 4 on an A4 page. Unless you have software that does this well it almost always ends in unbalanced and uneven pages that makes it difficult to print and cut. We have the software to do this, so please leave it to us. Send the file as a one-up image centered on the page. We can take it from there.
If you are producing a booklet, you can send us the file as one-up pages or as facing pages. If your job is full bleed then make sure that you have dealt with this properly and that your outputs are exactly balanced front to back. If you are not sure, please call us.
That’s enough for now – although there are more things we could mention (check back later and see if we add more – usually after we get the same problem for the third day in a row!). And don’t sweat – if this doesn’t make sense to you we can help you get it right – that’s what we’re here for! Our editing charges are quite reasonable and many of these issues can be corrected for about $10.