Use our online designer studio to create your own personalised flyers, business cards, greeting cards and more.
Order NowWhen it comes to professional printing and advice on your business marketing, we are the team to call! You can call us direct on 04 568 8773 or fill in our quote form.
Request a Quote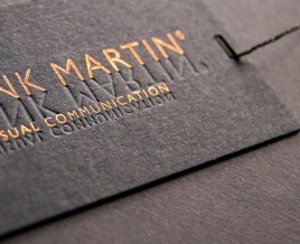
Finishing, a fancy term we printers use to describe the bits of work that go on after printing something to ‘finish’ the job. It’s all the nifty little things that the printer can do to add an upmarket finish to your printing that makes it stand out from the normal humdrum. Now you might think that doing anything more than just printing flat sheets of card or paper would add a lot to the cost of the work, but that is not always the case. Depending on what you want to have done, some of it will only add a few cents to the cost of your flyer while making look so much more up market. So we will give you a quick rundown on what options you have and how practical / costly it’s going to be
Folding
We all know what folding is, like how you get a A4 letter in to a DL envelope, so it’s simple to add to any paper print job. Normally the folding is a separate step and allows for a selection of different types of folds. The cost to setup and run is generally quite small and at most only adds an extra day to the process. At Copy Express we can even do some non standard ones within reason.
Creasing
Because card is too stiff to fold in general mechanical systems, instead we crease it. Creasing adds a pre-stressed point to the card so when a person goes to bend the sheet it naturally folds at the crease point. Like folding, creasing is a low cost finishing addition that is simple to do.
Perforation
By running a notched cutter disc over the paper or card we can partly cut it making it easy to separate. While there are some limitations on where we can perforate and how many we can do on a single item, there still a range of cool things you can do with it, all of which is low cost.
Padding
Just like the pads of jotter paper or refill, you can have stacks of your printing glued together in a handy pack that’s easy to peel off each sheet. It’s quite simple to do and while it does cost a little bit to start the padding process, doesn’t cost that much if you spread the amount over an decent number of pads.
Hole Punching
Need to throw things in to a ring binder or lever-arch folder, not a problem every printer can ring hole punch your printing. The better ones like us at Copy Express have specialist tools so we can punch a whole range of material and in a lot of different hole setups.
Binding
Includes staples, plastic and metal combs, swatch screws, slide and clamp spines, and a few other more specialist methods like perfect binding and stitching. If you need a bunch of papers held together then there is a way to do it that fits your needs and budgets
Die Cutting
By using what is essentially like a very heavy metal cookie cutter, you can cut your printing in to a wide range of different shapes, and even have custom dies made to give you a shape that are unique to you. Now there is a cost in both time and money to do this, and if you want a non standard shape that will cost you more, but when you want coffee loyalty card to be in a shape of cup it can be done.
Embossing
Using two stamps to press paper / card between them to leave a raised set of marks. Not cheap to do as the stamps generally have to be custom made for each job and it takes fair amount of of labour and time to do it. These days it’s been replaced in many situations with with Clear Coat printing.
Foiling
Foiling is where you use a heated stamp press a layer of metallic foil on to the surface of the printing. It is used for very high end finishes for products, especially things like certificate seals. Like embossing and die cutting, this will often require the creation of an expensive custom stamp and foil itself can be expensive too. It’s largely been replaced by Clear Coat printing to achieve a similar effect, even if the coating is not quite as fancy.
Watermarking
This is the faint branding marks that can be seen on high end printing. It use to be done by same sort of process as embossing, a stamp was pressed in the wet paper to compress some of the fibers to make it lighter or darker looking. These days a watermark is most often a very faint colour image that is part of the normal printing process and adds nothing to the overall costs.
Clear Coating
Essentially a 5th colour in the printing process. After the normal four colour printing has been done and allowed to dry, it’s fed through a new printer that prints with a clear varnish / sealer for a glossy highlight on top of the surface of the paper in only certain areas. This method has largely replaced other processes like foiling and embossing for a large number people.
 41A Bay St, Petone