Use our online designer studio to create your own personalised flyers, business cards, greeting cards and more.
Order NowWhen it comes to professional printing and advice on your business marketing, we are the team to call! You can call us direct on 04 568 8773 or fill in our quote form.
Request a Quote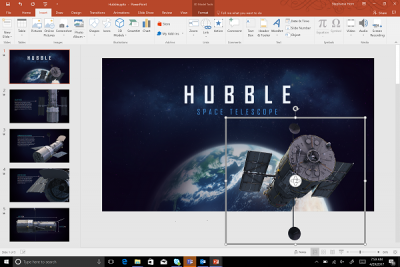
You need to make a quick flyer or business card but you don’t have a desktop publishing application on your computer to make it. It’s a one off job and you don’t want to buy or upgrade to Microsoft Publisher, and for some reason you can’t use an online tool like our own Design Studio (which is free to use). Sounds like an unsolvable problem. Well surprisingly enough, you might already have a simple design too available to you, Powerpoint. We are going to talk about what it can and can’t do and how you can use it to design things simply and quickly.
Let’s get the simple stuff out of the way first. If you have a computer it’s very likely you have Microsoft Office on it. Buy any premade pc and often there’s a basic subscription edition for it already installed no matter if you want it or not. If you have a work computer, almost all of them have Office as standard. The only issue is that not all editions of Office have Publisher, Microsoft’s desktop publishing tool. They all do come with Powerpoint so if you have it why not use it. There is nothing stopping you using Word to do the job, and it does come with a lot of templates you can use to make business cards, flyers, etc. Any program can do desktop publishing if you bend it hard enough, clients sending us A0 posters setup on Excel spreadsheets to print springs to mind, but Powerpoint has a few advantages over other Office applications.
With Powerpoint, all items on a slide are discrete. This means if you change one thing, like altering the size of a photo, it doesn’t change what you have done to other items on the slides. If you change a photo in Word, all the text shifts around it breaking your layout. Powerpoint comes with a wide range of inbuilt tools for text layout, graphics editing and effects and understands layers so you can stack text and images on top of each other to achieve some quite cool effects.
By default powerpoint sets the page to be viewed on a modern hd screen. On the ribbon menu go to Design>Slide Size and you can change it to any size you want. The default metric sizes have a white margin built in to them, but you can override that to make it any size you want in centimeters (for example A5 is 14.8cm wide by 21cm tall). If you want full bleed artwork then add an extra 1cm to both the width and height of the size you want to give you 0.5cm bleed round all edges.
If you have a double sided design, then using slide 1 for the front of it and slide 2 for the back is simple enough. What if you wanted to do a folded or multi-page item like a roll folded A4 brochure or a simple booklet. For multi-page work just set each page in logical reading order and we will set it up correctly. With items with folded sections, a quick way of setting up your alignment is to put a table on the page with as many columns as there are sections folded up in one row. Stretch the table to fill the page and you have a quick visual guide of how to align things that can be deleted when everything else has been put into place.
One limitation of Powerpoint that Word has over it is that you can’t set margins to prevent you putting text too close or over trim edges if you are trying to design a full bleed item. The simplest way around that is to create a rectangle 2cm narrower and 2cm shorter than the size of the slide (found in Insert>Shapes). Use the properties menu on the rectangle to bring up the format shape menu. Under the paint can icon set the fill to no fill, leave the line as it is. Under Size and Properties option (the square with arrows) Set the position as 1cm from the top left corner for both the horizontal and vertical position. This will give you a frame with all the contents inside of that will be at least 5mm from any trim line. When the layout is done, just delete the rectangle.
If your design has a lot of text, putting text into columns makes it easier to read. Powerpoint wasn’t designed to handle text in that way. You can cheat by using tables instead. Just put a table in that has one row and as many columns as you need. Paste the text into each cell and you can format it as any other block of text. Use the Table Tools to alter cell margins (Table Tools >Layout>Cell Margins) to give you more ‘white space’ for each column and turn off the borders, change them to look interesting and to create divider lines, with Table Tools>Design>Borders. If you play around with the table tool you can even use a grid of cells with some cells merged to create even more interesting layouts.
Found in the View>Show section of the menu. Both of these turned on help get things positioned in the right spots for your design. The default grid might be too large for what you are working on, so use the small arrow at the bottom right corner of the show menu to get to the options, change to what works for you. This also lets you turn on Snap to Grid which means anything placed on the slide positions and sizes to the grid you’ve chosen.
The Arrange tool in the home menu is a great tool for creating cool effects. Because each thing on a slide is it’s only object, you can change the way that they stack on top of each other with the layers above covering the ones below. A good example would be having a text block at the top, a cropped photo in the middle, and the background image at the bottom. How to make use of this one function is far too big to be covered in detail here, so just play with the stacking order of items to see what they can do. Do play with the transparency option for everything as it can produce some very effective results when you have a semi-transparent object on top of another one.
There is always a risk that when you send us a presentation file it might break because it’s looking for images or fonts found on your computer but aren’t on ours. It is always more reliable to send us a PDF as that is what we will use to print your design. To create a pdf use the File>Export>Create PDF/XPS Document menu. Pick a place to save it and a file name if needed and leave it for Standard quality. There are no other settings needed, just publish it and send us the pdf. While it won’t be as super high quality as creating it on a full desktop publishing application, the quality is normally more than good enough for general printing.
This is just the start of how to use Powerpoint for quick and dirty design work. That being said, why not use a real desktop publishing tool that you can access at any time for free. All you need is an internet connection. Our online ordering system has an inbuilt basic design software that a lot of your design needs. Just pick the product you need, like a business card, and then jump right in. We are working on an ever expanding range of templates too to help you get you started. So why visit Copy Express today and see how easy it is to use.
 41A Bay St, Petone