Use our online designer studio to create your own personalised flyers, business cards, greeting cards and more.
Order NowWhen it comes to professional printing and advice on your business marketing, we are the team to call! You can call us direct on 04 568 8773 or fill in our quote form.
Request a Quote
If you have bought a tv, camera, computer, tablet or smartphone, you would have seen terms thrown about like HD, 4k, or Megapixel used to describe how big an image you can see or how detailed it is. For a lot of people this means absolutely nothing to them, and ends up being confused or being sold something far more expensive than what they need because they ‘need’ those extra pixels. Not knowing what a pixel is can even affect us printers as people don’t understand the nature of them and end up supplying graphics that are too low or too high in pixels for what they need for printing. In this article we will explain what a pixel is, how it applies to the real world, and some simple tricks to translate between all the different standards effected by them.
A pixel comes from the world of computers and is used to describe a single dot of colour in an image. All images on the screen are made up of a grid of these dots. A graphic is made up of so many pixels across and so many pixels down. The more you have, the more detailed the image. The more pixels an image has, the more memory / storage is needed. (The amount of storage and memory needed is also changed by how colourful or complex an image is and what type of format is used to store it, but that’s outside the scope of this article.) Here’s an example of our company logo at 64 x 64 pixels and at 512 x 512 pixels. As you can see the more pixels you have, the more detailed and smoother the image is.
The problem is that pixels themselves don’t have a size, it’s just a measure of how many of them make up the image. Why do that? The full answer is a bit too long to cover here, but in simple terms it was not the physical size of the screen that wasn’t the limiting factor for images, it was the computer attached to it. In the early days they were focused on how many bytes of computer memory it would take to fill a screen with images and how long it would take to do it limited what they could do. As computers improved, they could put more pixels on the screen and the bigger the displays got, but even the oldest image could still fill the screen as it could be scaled up to fit. The example of our logo in two different resolutions (pixel sizes) shows how it is done.
If you brought a TV, smart phone, or laptop, the odds are you’ve had all these terms thrown at you but without much explanation of what they really mean. So here’s the short version of what each term means.
Times the number of pixels across an image by how many pixels down, and you will get a figure of the total amount of detail in an image. The larger the number the better the detail. These days it’s measured in millions of pixels or MegaPixels. You’ll most likely encounter the term when describing the quality of a camera image. The more pixels you have the more you can zoom into an image or crop parts off and still have a great looking picture. While there are other limiting factors (size and quality of the lens, the way the image is compressed, etc) the general progress is ever larger megapixels numbers for better images.
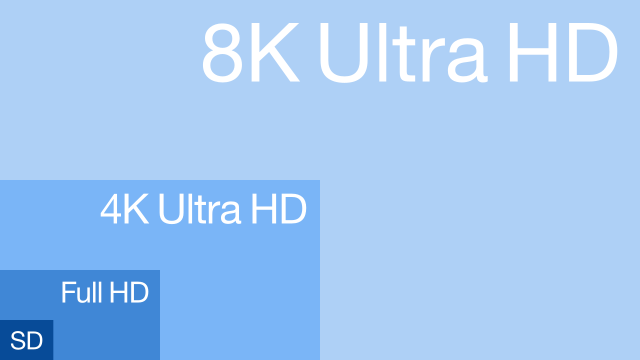
SD is the old TV standard (720 × 576 pixel / 0.4MP) which was fine when the screen was only a 14 or 18 inch, but on a 40” it would become very grainy unless you are sitting a good distance away. HD (1920 x 1080 pixels/1K/2MP) allows for larger screens while keeping smooth fast moving images. As screens keep getting bigger the number of pixels needed to make the images look good has to increase, leading to first doubling the width and height for 4K then a factor of four for 8K. With computers you will also find them being made with 2K or 6K pixels as this allows for more cost effective high resolution while keeping the same size or to have ultra wide screens for more working space. (Ultrawides have ratios of 21 x 9 or greater compared to the normal 16×9 of a standard tv or monitor.) Beyond that there is already a 16K size but again that’s outside our scope here.
As noted before, pixels are a measurement of quantity, not physical size. DPI (Dots Per Inch) is a measure of how many dots, or in this case pixels, for every inch (25mm) of the image. DPC (Dots Per Centimetre) is the same measurement but using a smaller length to measure the number of pixels in. Why is this important? It’s because above a certain density of dots per inch or centimetre the human eye can not see them, making it look smooth.
When it comes to images the two most important considerations are not just the number of pixels, but how many of them are in a given space. The higher the MegaPixel or Dots Per Inch values the better looking the image.

When you’re creating material for use in promoting your business, the megapixel and DPI directly effects the quality of the images. On a screen the traditional standard is that you have 72 or 96 pixels per inch on a screen. People are more accepting of having a pixelated display on a screen as it’s natural for a computer image. Screens for print, seeing blocks of dots is unacceptable in most situations, especially with text, so you have to have a DPI of 300 for them to be so fine that you can’t see individual ones and edges become smooth. (Most home printers work at the 1200-2400 DPI range to allow for a greater range of colours. Why they do it is for a different article.)
Why would having too low a DPI image affect the quality of your printing? When a printer has to print an image it converts everything on the page into a series of dots that the printer uses to pick what colours to put on to it. If there are not enough dots for it to use, then it has to make calculations to fill in the missing dots, and no matter how good the system, these ‘guesses’ are always obvious to the eye.
There are several different methods of getting online images to work for your printing needs. The first is to know how to work out their natural size.
12px equals 1mm of photo quality print. 8px equals 1mm of acceptable graphics print
To have nice smooth images in print you need about 300DPI which would be 300 pixels for every 2.5cm of image.That translates to 12px per millimeter or 120px per centimeter. If you need just acceptable quality then you only need 200dpi or 200px per inch which is 80 pixels per centimetre or 8 pixels per millimeter. This is a great way to work out how large an image you need to make a print of a given size or working out how large you can make an image before it looks grainy.
Examples:
In print that’s a good thing. Most desktop publishing programs have a function where you set the image detail to ‘print quality’ (300 dpi), and that will remove the unneeded pixels while still giving you the best quality image. If you don’t have that ability, don’t worry about it, as it’s easy for the printer to take the image, ignore the detail it doesn’t need, to maximise the print quality for its needs.
The reality is that you can’t easily fix an image to look better blown up. There are various routines that computer software can interpret an image to give more detail but you’ll still end up with a partly grainy look. Many photo editing applications have an enlarge or scale option where you can choose various ways of filling in the missing pixels when the image is scaled up. You have to play around with the different options to see which will produce the best results. We have an example of the Copy Express Logo blown up to 10 times it’s size compared to the image at it’s correct size to show the grainy look Sometimes it requires recreating the image from scratch to provide the detail needed, which can take time and money. If you can’t allow that, then you’ll either have to find a substitute image or just accept that you won’t have the best image.
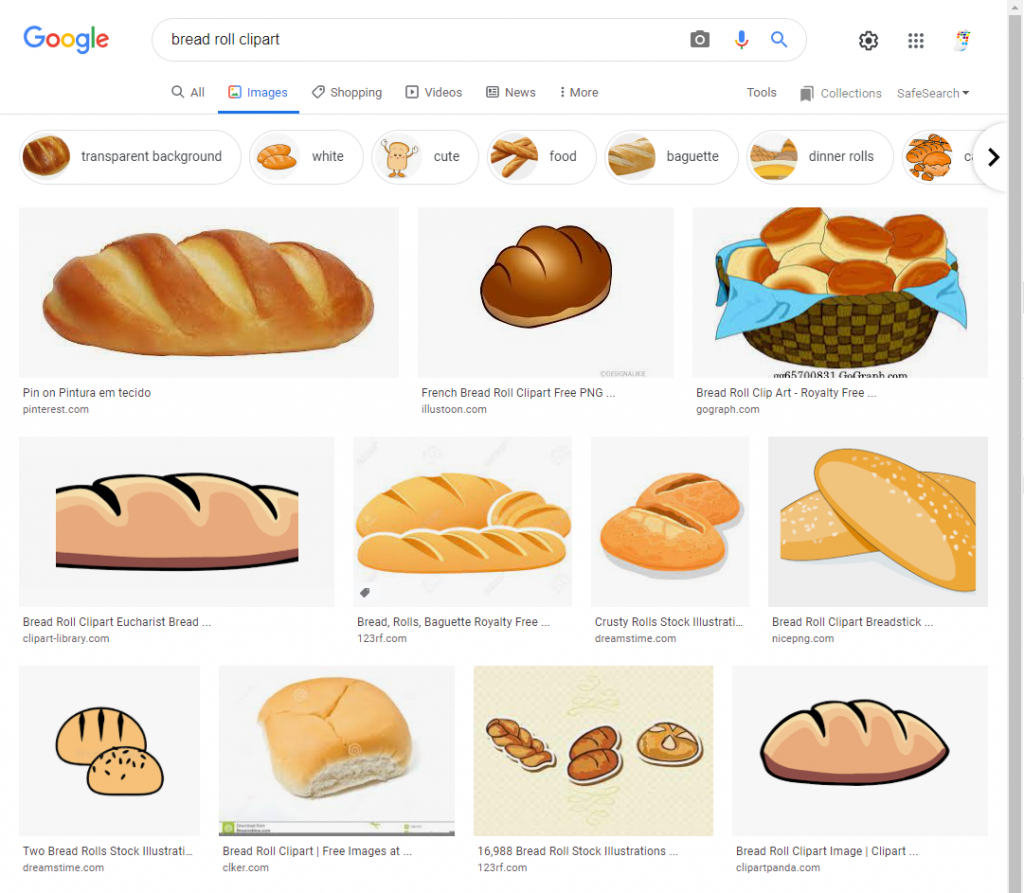
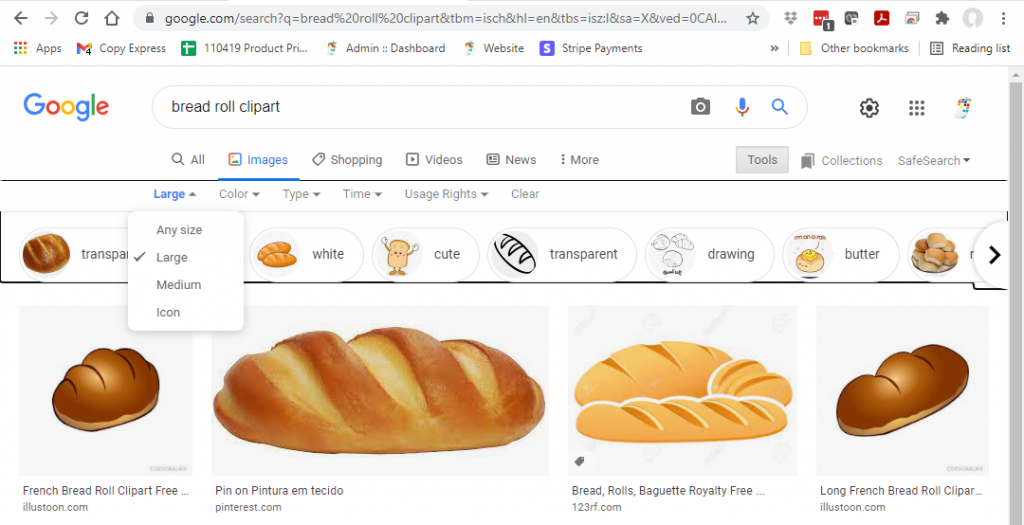
If you’re using google to look for images it’s not easy to figure out what images work best for print use. Here’s what you need to do. We’re searching for bread roll clip art in google and use that as the search terms This is the results
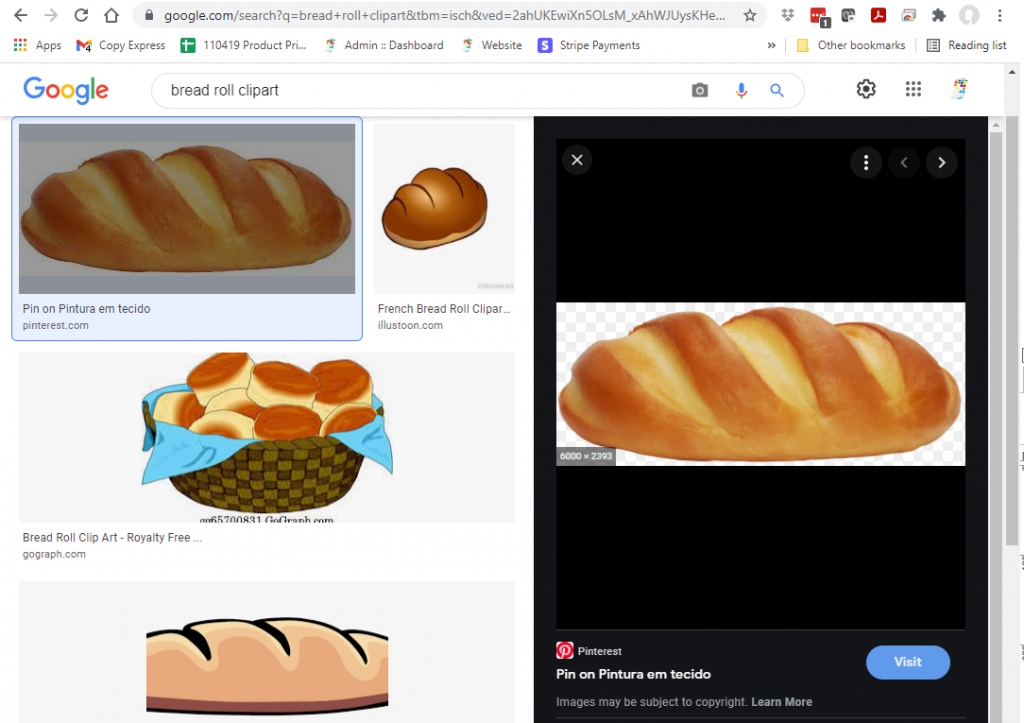
Selecting an example brings up the image with its full details. Hovering your cursor over the image gives its pixel size.
Microsoft Bing search is better for searching as it not only gives you the size of the image when your cursor is over it but the filter tools have greater size ranges and lets you search for images of a minimum size speeding up the process.
This is just the start of how to get the best out of the images in your printing and design. Knowing these basics will help you save time and effort by showing you what will be the best quality images to use in your marketing design. If you need more help, we here at Copy Express can help you with getting the most of the images or take over the full design process for you. Give us a call or email today.
 41A Bay St, Petone