Use our online designer studio to create your own personalised flyers, business cards, greeting cards and more.
Order NowWhen it comes to professional printing and advice on your business marketing, we are the team to call! You can call us direct on 04 568 8773 or fill in our quote form.
Request a Quote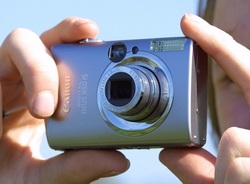
We have talked about digital photography several times in the blog over the years. While we have done our best to keep the technical terms to a minimum, and explain it in plain English where needed. Still many people may be confused by the terms. In this one article we cover the most common digital photography terms and what they relate to in your photos.
Simply put, the number of pixels (dots) used to make up a photo. The more dots you have the bigger you can print the photo, or part of it, before it gets grainy. 3 megapixels is great for 6×4” (15cm x 10cm) and does an okay A4. 8 megapixels does a great A4. Bigger than that you need more megapixels. How big do they get? You can buy 50mp cameras from a camera store today, and you can go bigger if you have the unlimited funds. Just to put it into context, the bleeding edge of television technology is only 4k or four kilo-pixels. It’d amazing how fast these things grow. I bought my first digital camera in 1999. It was a Kodak and had the work “megapixel” on it (no numbers!)
JPEG stands for Joint Photographic Engineering Group. This group worked out the standard of storing photos on a computer and gave their name to the file format. RAW is a file format where every pixels is stored uncompressed, making for huge files. Unless you are professional photographer, you will never need to use RAW.
If you have poked around the photos you have captured you may have found the EXIF or EXchangeable Image File (though they do have different names depending on the camera maker.) These files contain data that is associated with the photos you have taken, describing the camera that took the photo, what settings were used, and even your details and GPS data of where the shot was taken if the camera has the capabilities. If you want to know what the photo says about you, you can bring up the properties of the photo and it will be in a tab marked ‘details.’ This information can be really useful in photo editing, but If you don’t want that information to be known by others if you sent it out, you have the option of removing it there.
These are a quality setting that is applied to your photos, trading file size for image detail. If you just snapping photos to text or email to friends, corse/low quality photos are good enough for looking at on a phone and keeps your data consumption low. If you want the best for your print with minimum amount of blurring or noise in the image then use fine/high.
Zoom is obvious enough, but what people don’t realise that there are two types. Optical zoom physically moves the lens out to have a tighter focus on a more distant object without changing the size of the resulting image. Digital zoom simple blows up a small part of what the camera sees to fill up the frame so you will get a drop in image quality at the largest zoom sizes. Needless to say most cellphones cameras have digital zoom only, so you may as well never use it.
These three settings work together to effect what is in focus, what is captured and how much detail there is. By adjusting one you effect the others in different ways or change what settings are available to you with the other two. ISO/Film Speed. While there is no ‘film’ in a digital camera, the ISO changes how sensitive it is to light. When you have less light or a lot of movement you set the ISO to a higher number, and a lower number when it’s bright or no movement. The trade off is that the higher the ISO number the more noise/grain on the image unless you have the other two set just right. Fstop / Apeture effects the field of focus or the distance from where images start and stop being in focus. The higher the number the longer the distance and the less light the camera sees so the less detail it captures. Shutter Speed is how long the camera spends capturing an image in a fraction of a second, the smaller the fraction the less time spent and less amount of light it has to work with but the less blurring you have of a moving object.. The simple rule is this, you want the camera to get the most light it can, so if you are reducing the amount of light it can capture by altering one of the three the more you have to adjust the other two to compensate. Now most modern digital camera have sets of pre-programmed modes (outdoors, party, sports, etc) that adjust these setting to give you the best shot, so you don’t need to worry about it unless you really want to get into it.
While we might think most lighting is white, it actually isn’t. Every light has a cast or colour temperature – cold lights, like fluorescence, have a blue or green tint to it, warm lights, like old style light bulbs, have a yellow or red tint to it. The human eye can compensate for it, but cameras aren’t that smart so things will come out with a coloured tint to them. Modern cameras allow you to adjust how they record the scene so that white comes out white and not pale blue. While you can do this manually, those pre-programmed modes also have adjustments for white balance.
Exposure Values are used to adjust what the camera sees by increasing to decreasing the contrast of the shot it takes. By default cameras will try to find a balance between the brightest and darkest part of the image, but this can result in over or under ‘exposing’ part of image. By adjusting the EV value you can alter the range the camera works in allowing you to correct this. Again this is a setting that is more for the photographers, as the pre-programmed modes of the camera will do this work for you as long as you select the right scene.
A feature of all modern cameras, autofocus points is a grid that is used by the camera to work out what it focusing on. High end camera are smart enough that they use their grid to constantly focus on the subject, even moving ones, adjusting their lenses and other settings to get the best shot possible. Lower end camera and smartphones allow you to use their touch screens to tap and direct the camera to adjust their focus to a given point.
That’s enough for now but if you want to learn more there are tons of great web articles and videos that will cover it much more depth that what we have room for here. And as always, if you want some advice on how to pick the right setting for your camera when taking photos for your next printing job with us at Copy Express, just give us a call and we will be happy to answer your questions.
 41A Bay St, Petone